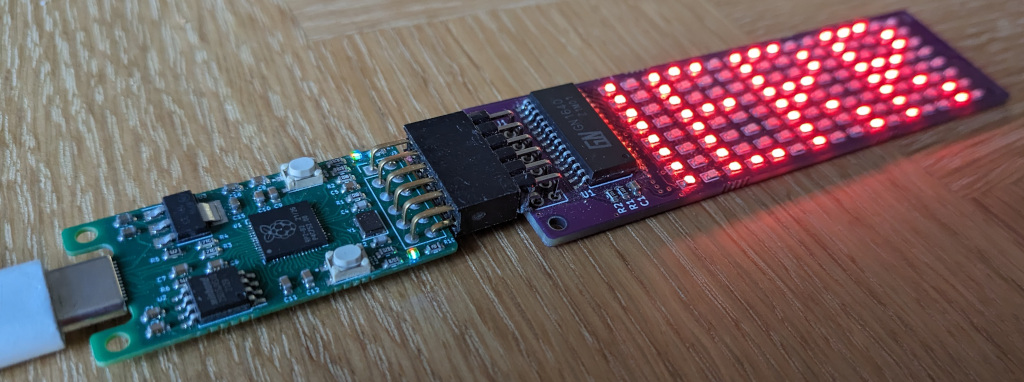
The PMod LED array was inspired by a post I spotted on twitter a long time ago, while i have used big colour displays and 7 segment displays it is always nice to make something relativilily simple. I this case an array of 128 LEDs, arranged to make a simple scrolling display.
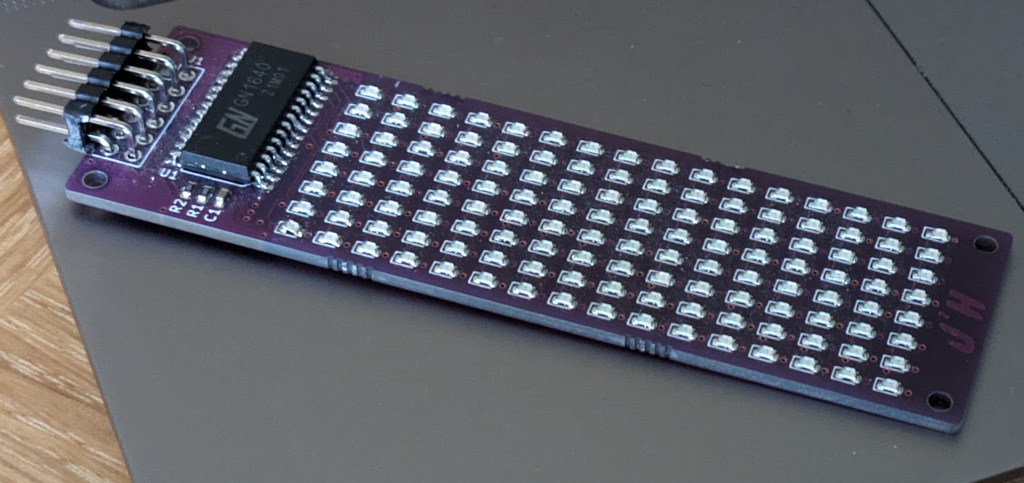
Like all my boards, the schematic and PCB design was created using KiCAD, using the GN1640 chip which I purchased from LSCS a while back when building my 7 segement displays. The advantage of reusing this chip is that it allows me to make use of the code that I have already writen and used to control these displays.
Hand assembling these boards was relativity simple, although time consuming, takinga long time to fit all those LED’s one at a time. The first version of the board also had a footprint error for the GN1640, which while a simple fix was fustrating to discover after placing all those LED’s.
With the boards assembled the next task is the software, thankfully using the same parts of in the 7 segement display saved a lot of the hand work here as the commands for controlling the array all wrapped up in a class that is designed to run on the RP2040 PMod Boards. For this example I’m using the PMod Mini Board, which has a single PMod Connector and is ideal for testing this board.
For building up the scroling example I make use of the C++ object I created for the 7 segment displays which provides the setup functionality as well as the ability to set the display using the txData function, but the other 7 Segement specific functions aren’t used.
class MyLedDisp
{
	private:
		uint8_t pin_clk;
		uint8_t pin_data;
  public:
    MyLedDisp(int data_pin , int clk_pin);

		void enable();
		void txData(uint8_t pos, uint8_t data);
		void setDisplay(uint8_t data[16]);
		void setValue(double value, uint8_t decimal);
		void setValue2(double value1, double value2, uint8_t decimal);
};
Because i’m using the txData function to directly drive the LED values, I need a library of characters that can be displayed, for this I created a quick library of characters, with 8 bit values for each line of the display then a way of looking up the character created.
// Charcater E
character_value[4] = 'E';
character_len[4] = 3;
character_store[4][0] = 0b11111111;
character_store[4][1] = 0b10010001;
character_store[4][2] = 0b10010001;
character_store[4][3] = 0b00000000;
Using this library of characters and associtated LED positions, I can specify a string which in the example here is MERRY CHRISTMAS and work though the characters to fill up our display buffer display_buff that has all these characters and spaces assigned to them.
int counter = 15;

char my_str[20] = "MERRY CHRISTMAS";

for(int my_char=0; my_char<15; my_char++){
    for(int i=0; i<26; i++){
    	if (my_str[my_char] == character_value[i]){
	    	for(int j=0; j<character_len[i]; j++){
		    	display_buff[counter] = character_store[i][j];
    			counter++;
	    	}
	    	display_buff[counter] = 0;
	    	counter++;
    	}
    }
	if (32 == my_str[my_char]){
		 counter = counter +4;
	 }
}
With the character all turned into one giant array int8’s which we can then send them onto the display. By moving our reference point every 100ms we can create the appearance of the message sloly scrolling across the disaply, with a blank period at both the start and end we can then wrap round to the start of the message here as well.
while(1){

	uint8_t my_disp[16];

	for(uint8_t pos = 0; pos<16; pos++){
		my_disp[pos] = 0b00000000;
	}

	for(uint8_t main_pos = 0; main_pos<(total_len); main_pos++){

		for(uint8_t pos = 0; pos<16; pos++){
			my_disp[pos] = display_buff[main_pos+pos];
		}
		Display2.setDisplay(my_disp);
		sleep_ms(100);
	}
}
This creates a scrolling message on the display, which can be specified at compile time. This example shows just one way in which a display line this can be used, but it also allows a more graphical display than the 7 Segment Displays that I have perviously used, allowing for more creataivity in the use of these displays.