
Using my 7 segment display I wanted to build a Christmas countdown, this was just going to use the PMod Display that I had around, and then run from one of the RP2040 boards that I built earlier this year. As I wanted a count down that is frequently updating, I chose to use the countdown in seconds, as this for the month of December easily fits within the seven segments available.
The code that runs on the RP2040 relies on a serial link as there is no real time clock on the RP2040 boards. We can also reuse some of the libraries that I use to drive the seven segment display, this means the main function is relatively simple, to run on the RP2040, which takes the count down calculated on a main computer and takes it from the serial link and puts it onto the display.
#include <stdio.h>
#include <stdlib.h>
#include "pico/stdlib.h"
#include "pico/stdio_usb.h"

// Custom 7 Segment Display
#include "My7Seg.h"

int main() {
	//initalise the display
	My7Seg Display(0,2);
	Display.enable();

	int seconds_left = 0;
	char buffer[8];
	char countdown_str [8];

	stdio_init_all();
	printf("Countdown Clock starting!\n");
	Display.setValue(double(99999999), 0);

	while(1){
		buffer[0] = getchar_timeout_us(0);

		if (buffer[0] != 0){
			if (buffer[0] == 'a'){

				for(int i = 0; i<8; i++){
					buffer[i] = getchar_timeout_us(0);
				}
				seconds_left = strtof(buffer, NULL);
			}
		}
		Display.setValue(double(seconds_left), 0);
	}
}
The actually calculation of the number of seconds takes place on a Raspberry Pi Zero, this takes the current time which it gets from its Wifi Network connection, and then calculates the difference between the current time and the number of seconds until Christmas day, and sends it over the serial link to the RP2040 Board.
import serial
import io
from datetime import *

# /dev/tty.usbmodem1101 115200

ser = serial.Serial('/dev/tty.usbmodem1101')  # open serial port
sio = io.TextIOWrapper(io.BufferedRWPair(ser, ser))

while(1):
	now = datetime.now()
	thisyear = now.year
	xmas = datetime(thisyear,12,25)

	if now < xmas:
		delta = int((xmas - now).total_seconds())
	else:
		delta = 0

	my_str = str('a'+ str(delta))
	my_str.ljust(9, ".")

	sio.write(my_str)
	sio.flush()

ser.close()
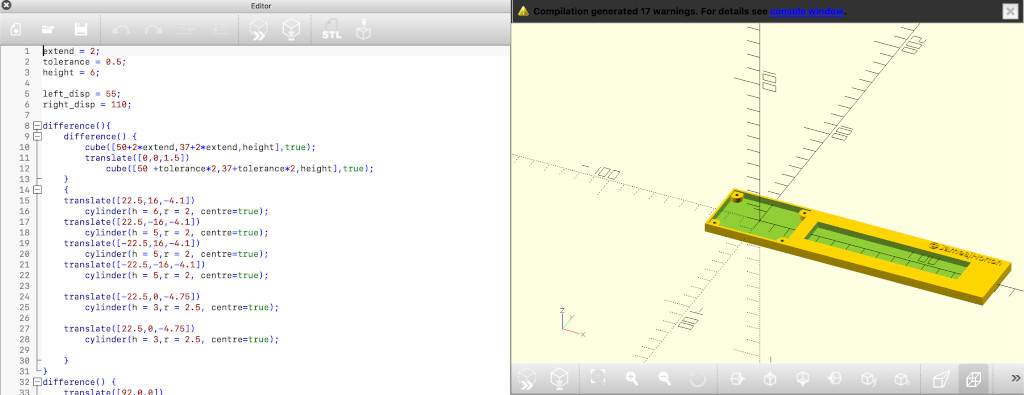
With the main coding element taken care of the next task is building the case for the PCB’s, I wanted to be able to mount the two boards together, and be able to attach the whole setup to my whiteboard, for the I created a simple case, which has holes in the back for placing some small magnets, and then holes in the front for mounting the PCB’s on the front.

This simple case provides an effective way of being mounted up on the Whiteboard, although now I am finally getting round to writing this all up, it is several days past Christmas so until next December it will have to wait until then, unless I can find a new date to countdown until.

The code used to create this board, and the code for the case will be available here.